[Editor’s note: Big shout out to Joe for sharing his experience installing two Dakota Lithium 23 Ah batteries on his Hobie Pro Angler 14 fishing kayak. There are many ways to install a Dakota Lithium battery, but we found Joe’s instructions helpful and rich in detail and wanted to share. You can download the PDF instructions he created here.]
By Joseph Brillhart, Dakota Lithium customer & community member
Install adequate deep cycle, rechargeable battery(s) in my Hobie PA 14 to operate a Humminbird Solix 10 which draws 2.5 Ah. The battery(s) should be capable providing continuous power for at least one 10 hour day of fishing without a recharge.
[Editor’s note from DL on battery terms: Ah = amp hours, how many amps of power are used in an hour. For example, a fish finder that is drawing 2.5 amps of power an hour would operate for 9.2 hours if powered by a Dakota Lithium 23 amp hour battery. Two DL 23Ah batteries would provide 18.4 hours of run time. This math only works for Dakota Lithium iron phosphate batteries because the voltage curve is flat, meaning the voltage is steady for all 18.4 hours. If using a lead acid battery the voltage drops steeply as it discharges, so a 23 Ah rated SLA (sealed lead acid) battery would only last half as long, even though it technically is rated to the same amount of amp hours.]
1. Battery Criteria in order of importance
a. Must be safe
b. Must be permanently installed below deck and secured against movement so that when I roll the kayak over on its side to install or remove the wheels the batteries stay put.
c. Must be as light as possible.
d. Must be cost effective
e. Must be highly reliable and maintenance free
f. Very desirable for the battery(s) to fit in the aft compartment due to the way I load and handle the kayak
Based on the power requirements of the Solix and my desire for 10 hours of fishing without a recharge, I would need a minimum battery size of 30 Ah assuming a draw down of 80% leaving 20% power remaining (10 hours of fishing x 2.5 Ah x 1.2).
Because of the space constraints and the irregular shape of the aft Hobie compartment it became obvious that all the batteries that met the power requirements would not fit in the compartment. Not only that, it was also unlikely I would even be able to fit them in the forward compartment without giving up the cargo tub. I did not want to give up any other areas of the kayak and I didn’t want a portable plug-in box that I had to load on the kayak every time I launched it. But I kept looking.
Another design challenge, assuming there was a battery that would fit, there was no way to use fasteners such as screws or bolts inside the compartment to secure the battery.
After quite a bit of looking, I found that the new Dakota 23 Ah batteries would meet the power and weight requirements, provided I could install two of them. The published physical size of the battery was was very close to the compartment size providing the batteries could lay nearly horizontal. I made up wood block models and it appeared that the batteries would fit, however the hatch assembly would need to be removed for installing or removing them. I contacted Dakota to see if there would be any problem with a horizontal installation and was assured that the batteries would be just fine installed horizontally. At this point I purchased two of the Dakota 23 Ah batteries and kept my fingers crossed that I could figure out a way to secure them in place.
The new Dakota batteries arrived and the actual dimensions were as advertised. They weighed 6.4 lbs each, which is less than half the weight of an equivalent lead acid battery. They still needed to have a hefty mount to prevent movement. In order to mount and hold the batteries I needed to design a battery tray that would both hold the battery and secure itself to the kayak structure in some way. Luckily, the aft compartment on a Pro Angler 14 has a heavy molded web running longitudinally down the center of it. The web is there to provide a home for the retracted skag and rudder underneath the hull. One battery would need to positioned on either side of the web. The only method I could devise to secure the batteries would be to design a battery tray that would clip over the web. One way to do this would be to have a lip on the tray that would slide down over the web. The second tray would then slide down over the lip of the first tray making it a nested assembly. The trays would be designed to hold the battery in all directions. The trays themselves would also need to be prevented from moving, especially sliding forward and aft. Sliding aft was not so much of a problem as the hull narrows down to almost eliminate movement aft. To prevent forward movement, a wooden bulkhead stop was made to slide down over the web. The web conveniently gets wider at the forward section of the compartment so that the wooden stop is prevented from moving forward. The stop mates up with the forward section of the battery trays and prevents them from sliding forward.
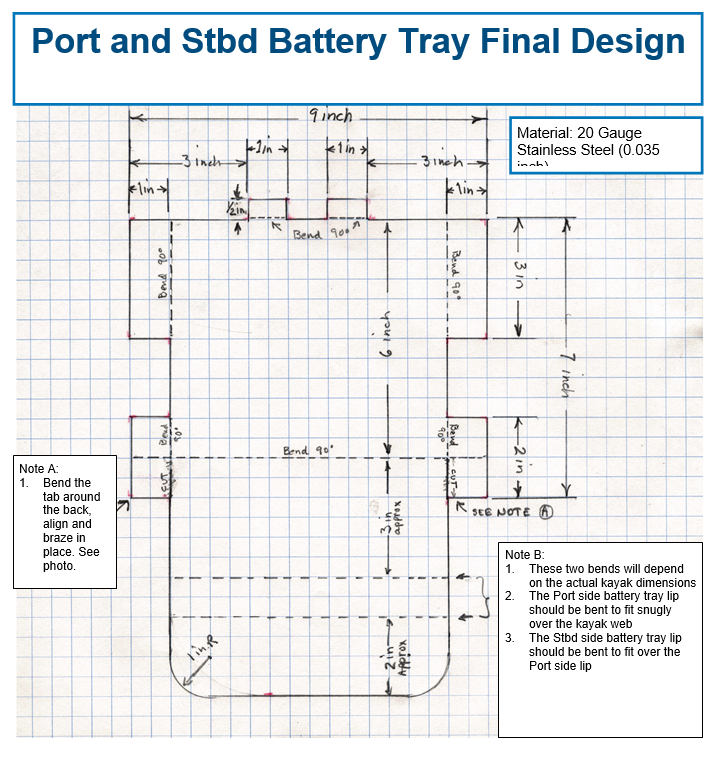
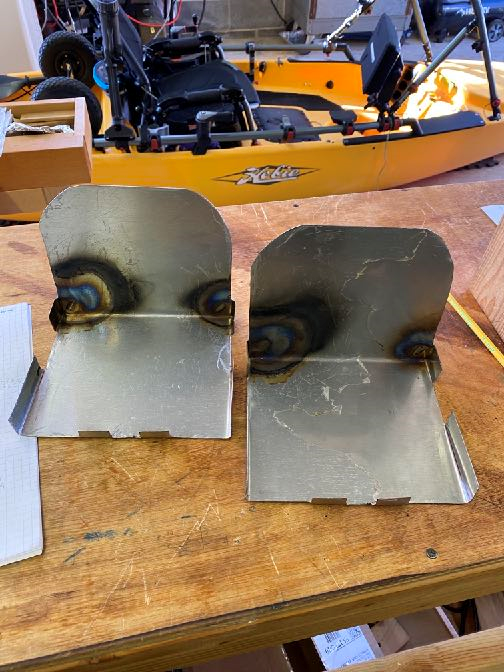
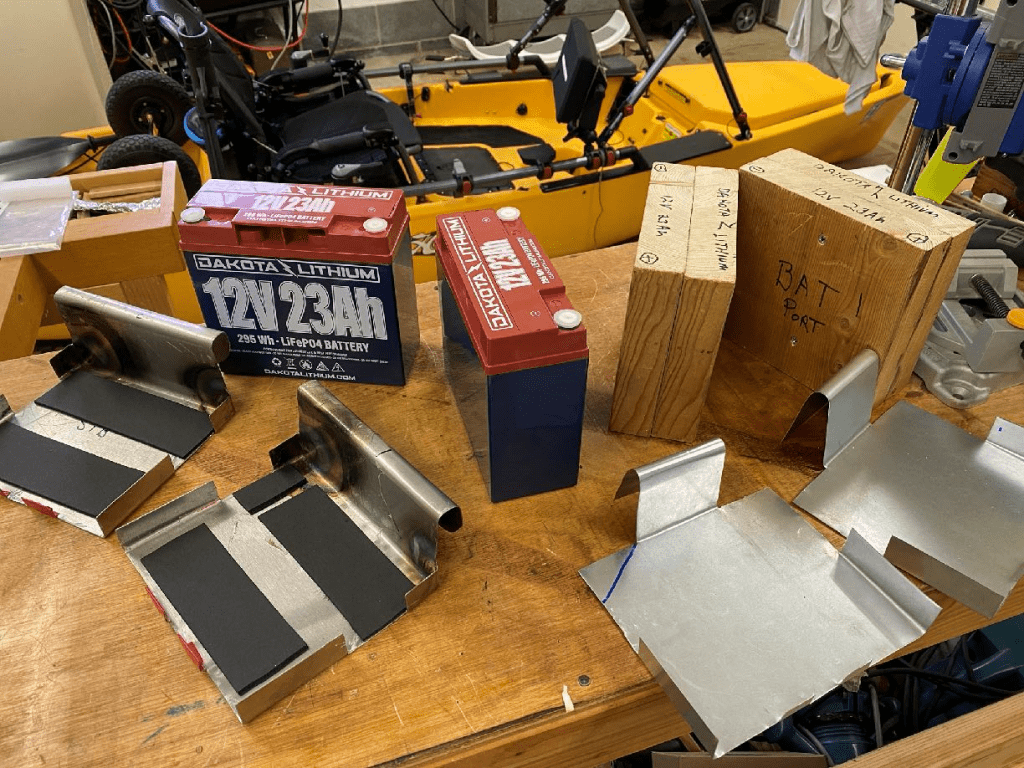
At first I made prototype battery trays out of 25 gauge galvanized sheet metal. I was pretty sure these would be too flimsy but it was easy to work with. They were too flimsy as it turned out, but these prototype trays along with the wooden battery models really helped me come up with a great final design for the trays. 20 gauge (.035 inch) stainless steel sheet was used to make the final battery trays. 20 gauge stainless is not a joy to work with but between a jig saw and standard sheet metal tools, I was able to get it done. The one exception to the standard sheet metal tools was that in the final design I bent over tabs on the corners adjacent to the web lip so that the back would have more rigidity. The tabs were silver soldered but probably could be riveted.
I padded the heck out of all the mating surfaces, especially the hull and web areas. The battery trays had thin foam strips installed to pad the batteries. Lots of focus was put on trying to prevent any chafing and movement of any kind. The sheet metal corners were filed as well as all the edges. After everything was done the batteries were placed in their trays, the electrical harnesses were connected and duct tape was used to prevent upward movement and also to secure the battery harnesses. I considered using Velcro for this but I think it would have added too much thickness. It turned out that even with the duct taped battery modules, there was almost zero clearance—but there was enough. The batteries fit so snug in the end, I was pretty certain there would be no movement, no matter what orientation the kayak was in. Actual practice has since proved that out.
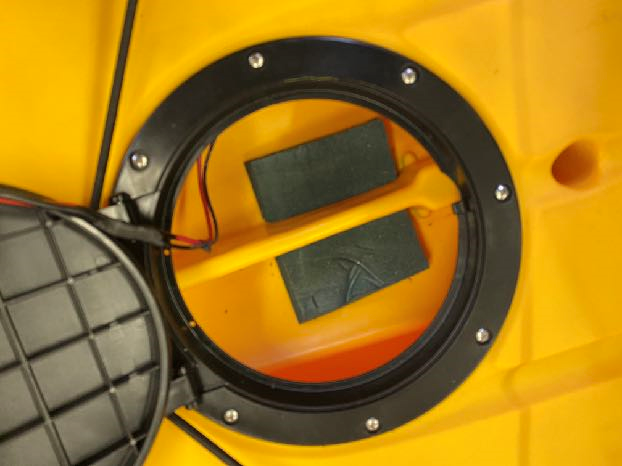
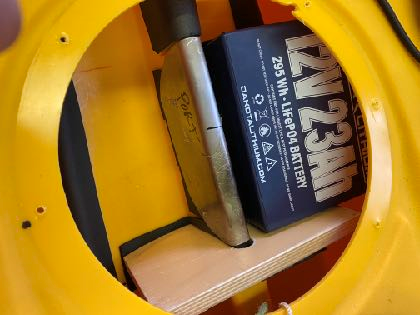
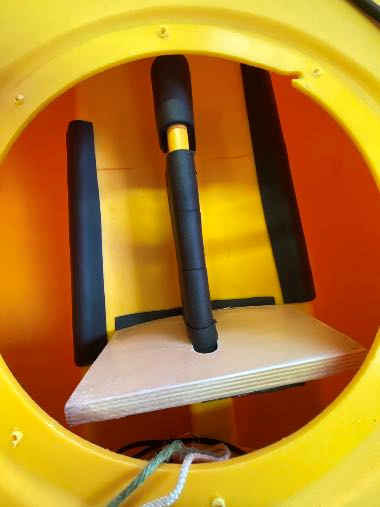
Shown is the aft hatch with the hatch cover assembly still in place. Other than the two pieces of 1 inch foam that have been temporarily laid in the bottom, this is how the empty compartment looks. Here you can clearly see the web that runs down the middle of the compartment.
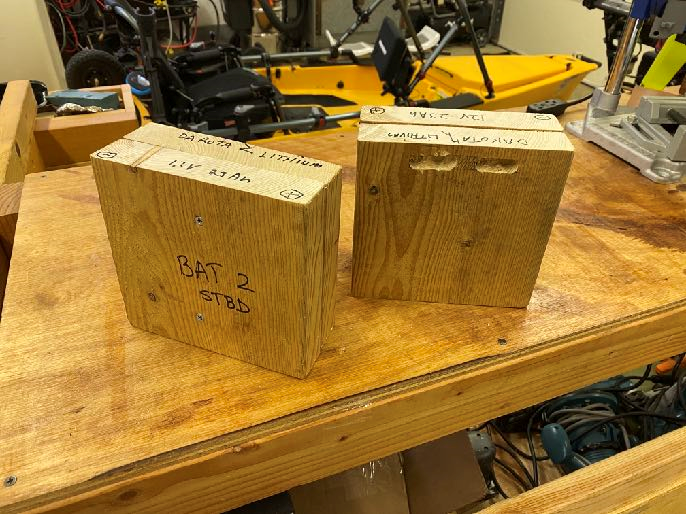
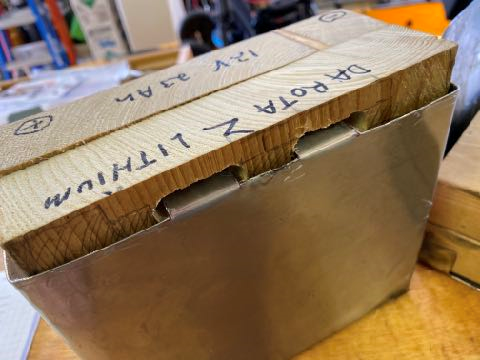
Wooden models of the batteries were made using two 6.5 inch pieces of standard 2 x 8’s screwed together. Batteries are 7.125 in long x 3.03 in wide x 6.57 in high.
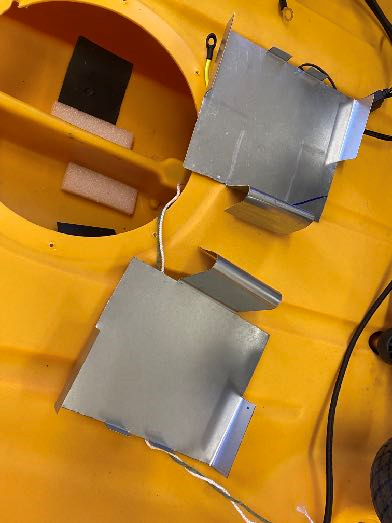
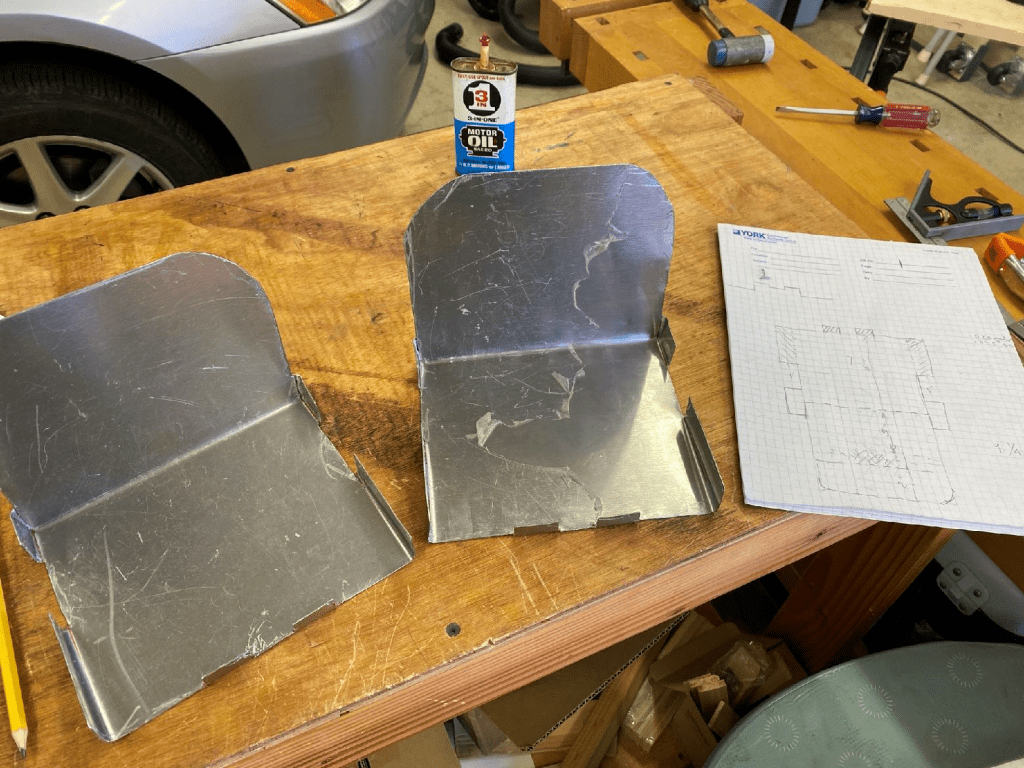
Galvanized sheet metal was used to make prototype battery trays that would clip over the web
Wood batteries were placed in the prototype trays and loaded into the kayak. Good news. They fit.
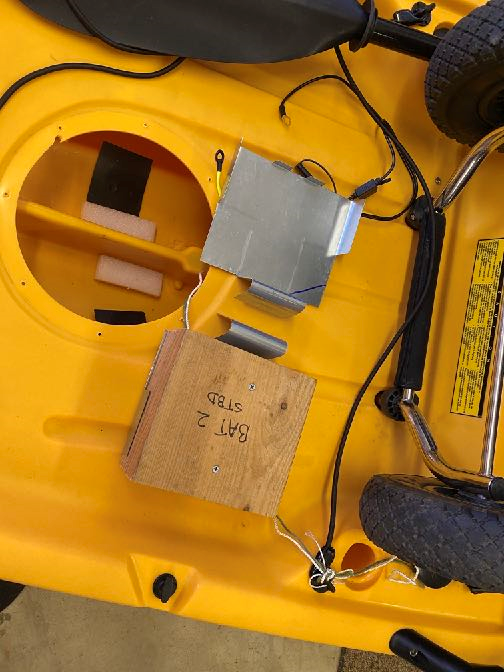
The fit was acceptable but the trays were too flimsy. A stronger lip was needed and the whole tray needed to be more rigid.
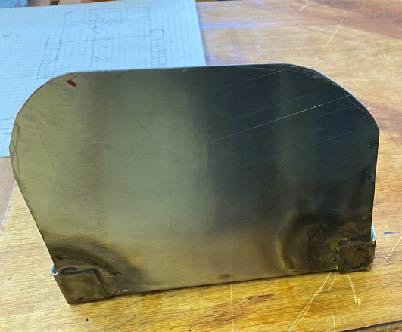
Battery tray that has been bent (except for the lip). I bent the main bend by clamping the sheet over a 2 x 4 in a vise and used a mallet to bend it. Then I bent the tabs up using sheet metal tongs.
Next I bent the small tabs on the corners around the back and then Silver Soldered them. This really strengthens the back.
The two tabs on the front edge of the tray fit into slots on the battery case and prevent lateral movement of the battery.
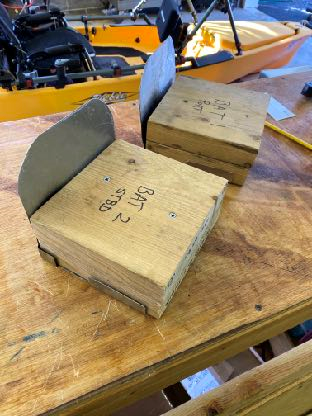
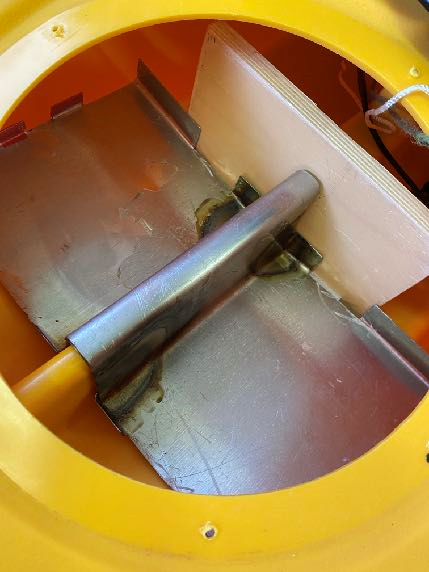
I put the wood batteries in the tray and then put them in the kayak to measure where the last two bends needed to be.
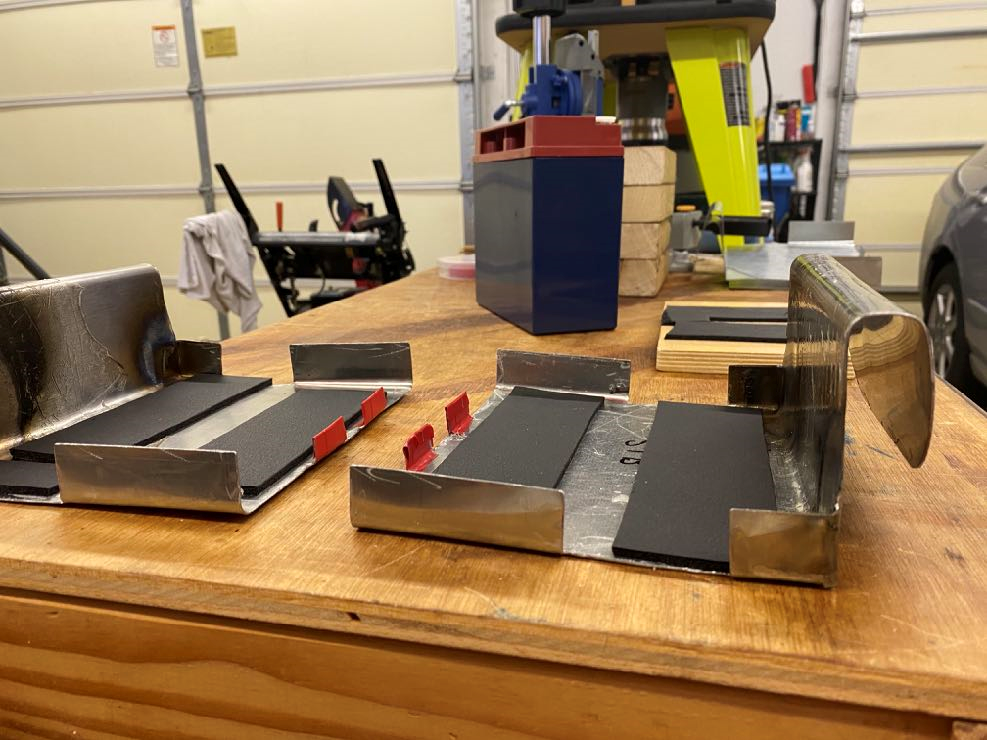
Here are the finished stainless steel battery trays with foam tape added. I put a couple wraps of red electrical tape over the front tabs that fit into the slots on the battery to prevent any wear. I used a 1 x 2 to make the final bends after I measured with them sitting in the kayak.
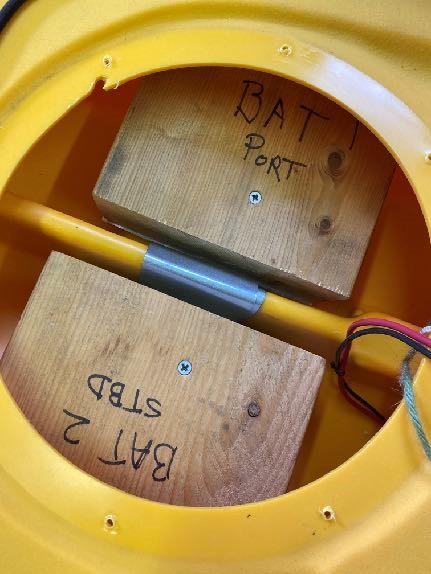
Although the picture doesn’t show it well, the lips of the trays are slightly different as the starboard side fits over the port side which fits over the web. That means the port side battery goes in first.
Port side tray gets loaded first
Starboard side tray gets loaded last.
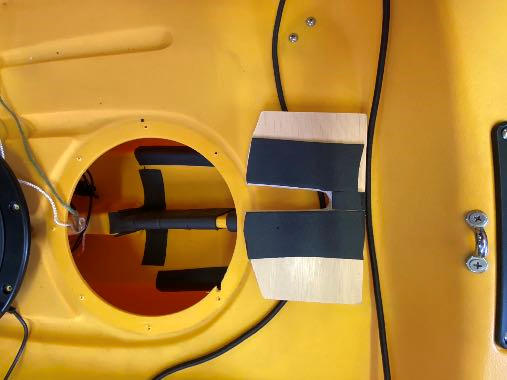
The bulkhead stop was made out of a piece of 1/2 inch plywood. I used a contour gage to measure the web so I could get a good fit. It is designed to slide over the web and prevent the batteries from moving forward. Plenty of foam tape was used to keep things snug and to prevent movement.
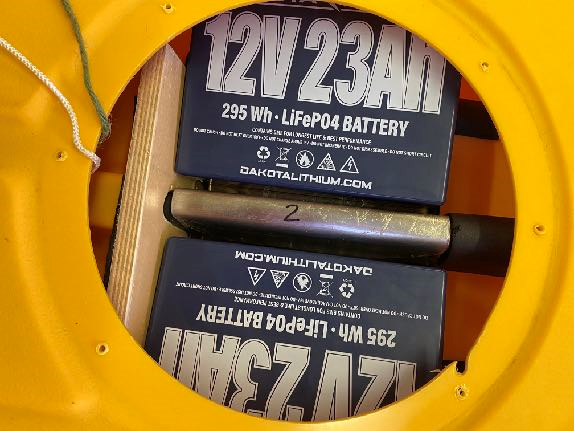
Everything fits like a glove.
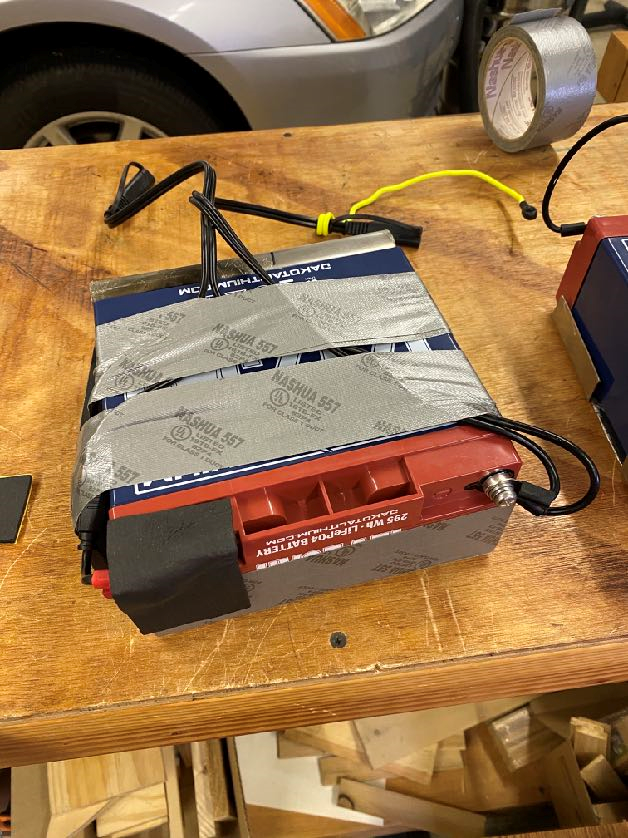
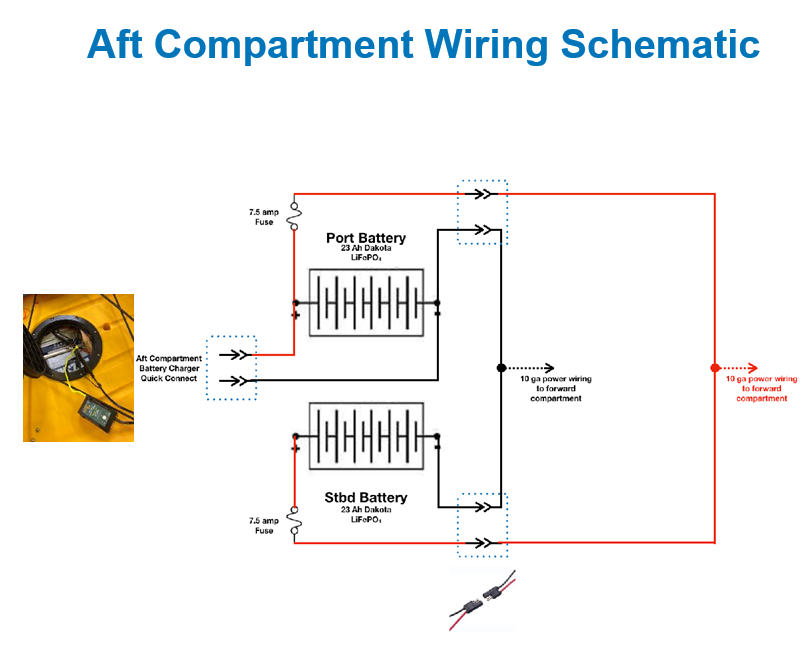
Final mating of the battery to the tray and adding the quick disconnect harnesses. The port side battery also has the battery charger quick disconnect attached to it. Duct tape was wrapped around the sides as well as the top and bottom. The duct tape will keep everything tight including the wiring. I covered the positive post with insulation.
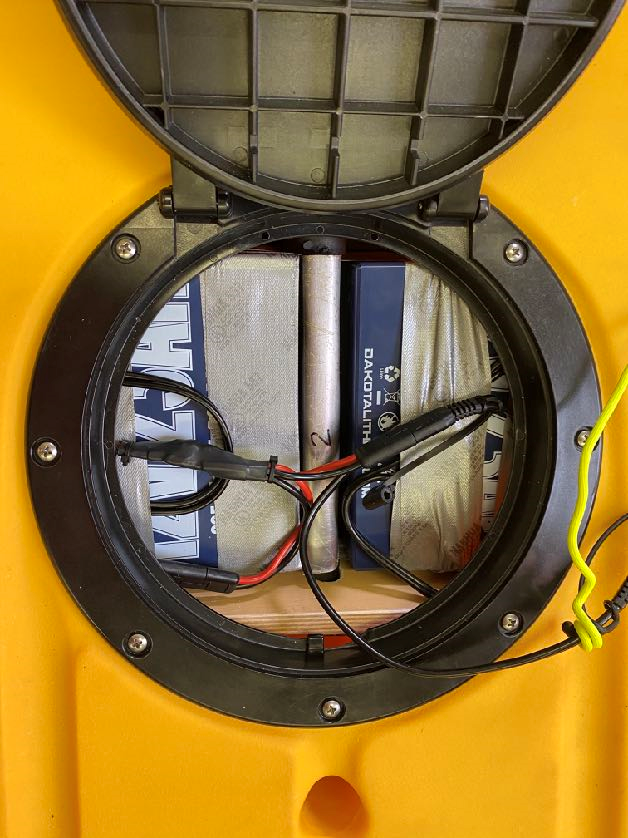
Battery modules both loaded and snug as a bug. The hatch cover has been re-attached. The yellow twisty is attached to the quick disconnect for the battery charger connection.
Battery modules both loaded and snug as a bug. The hatch cover has been re-attached. The yellow twisty is attached to the quick disconnect for the battery charger connection.
