Dakota Lithium: The Story Behind This Practical Sustainable Energy Product Company
READ THE ARTICLE


WHO WE ARE …
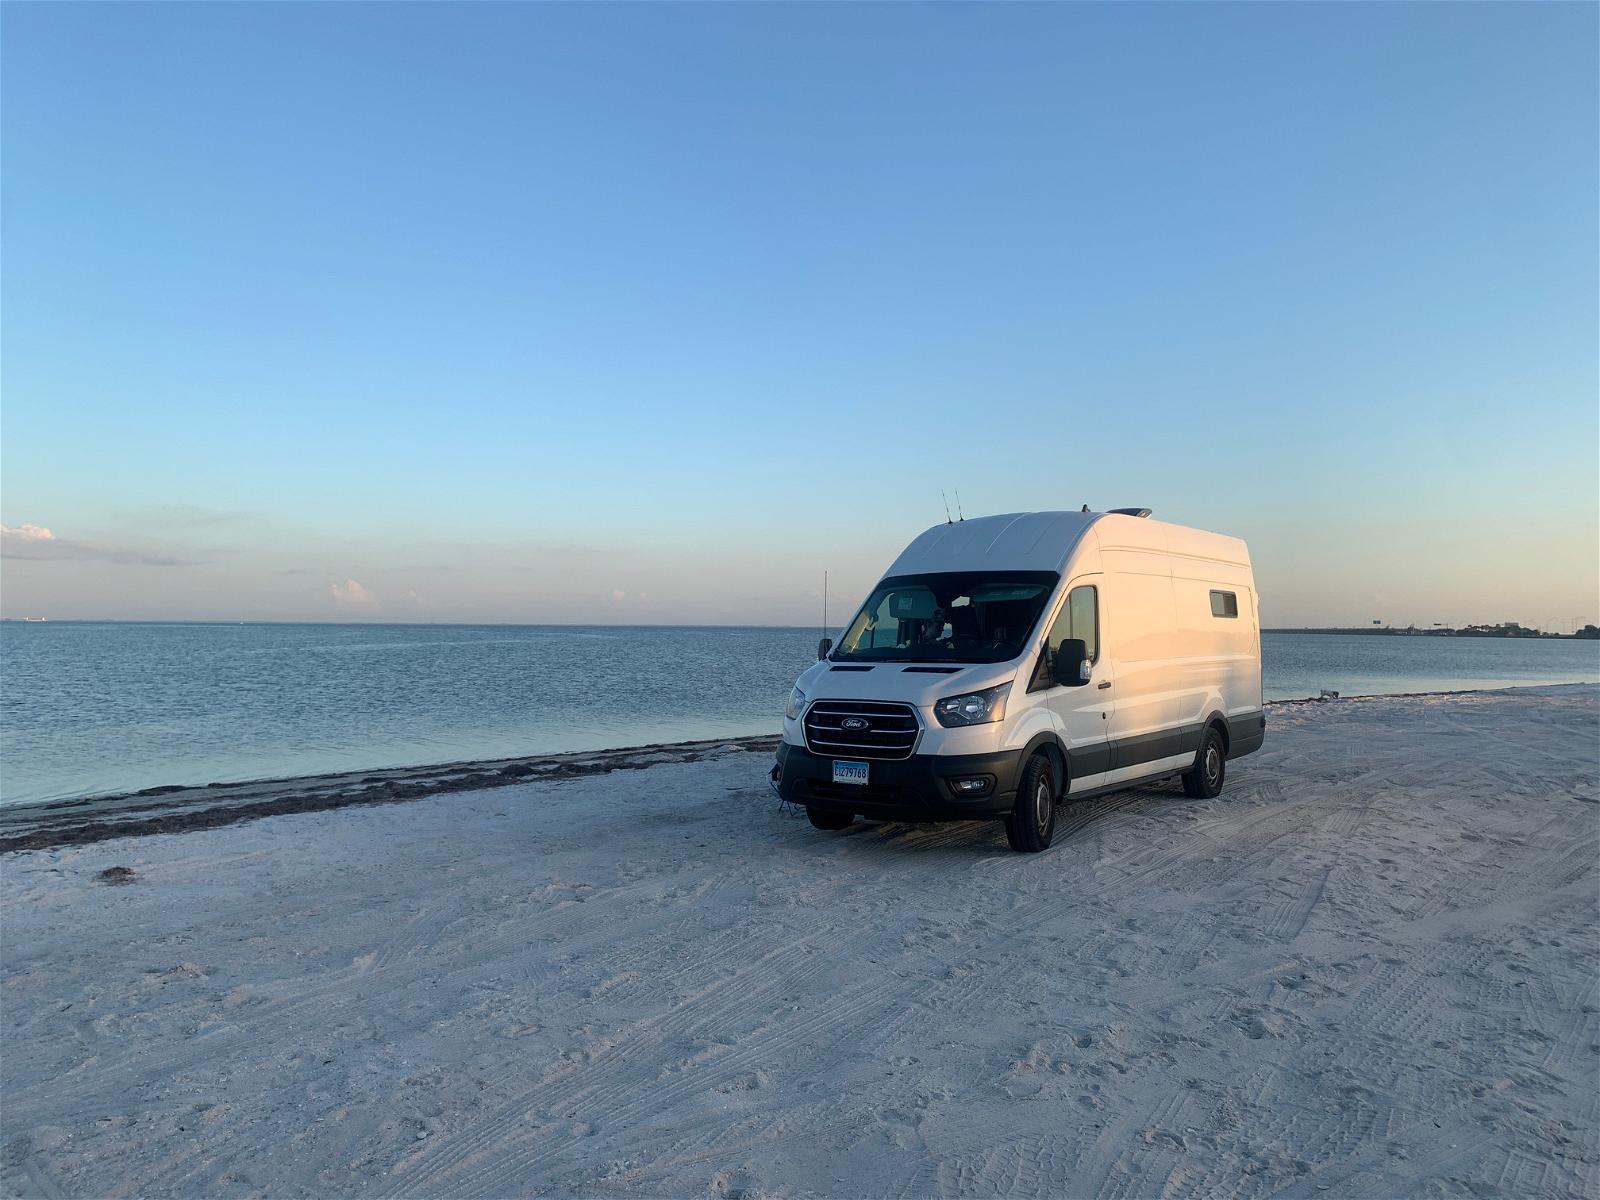
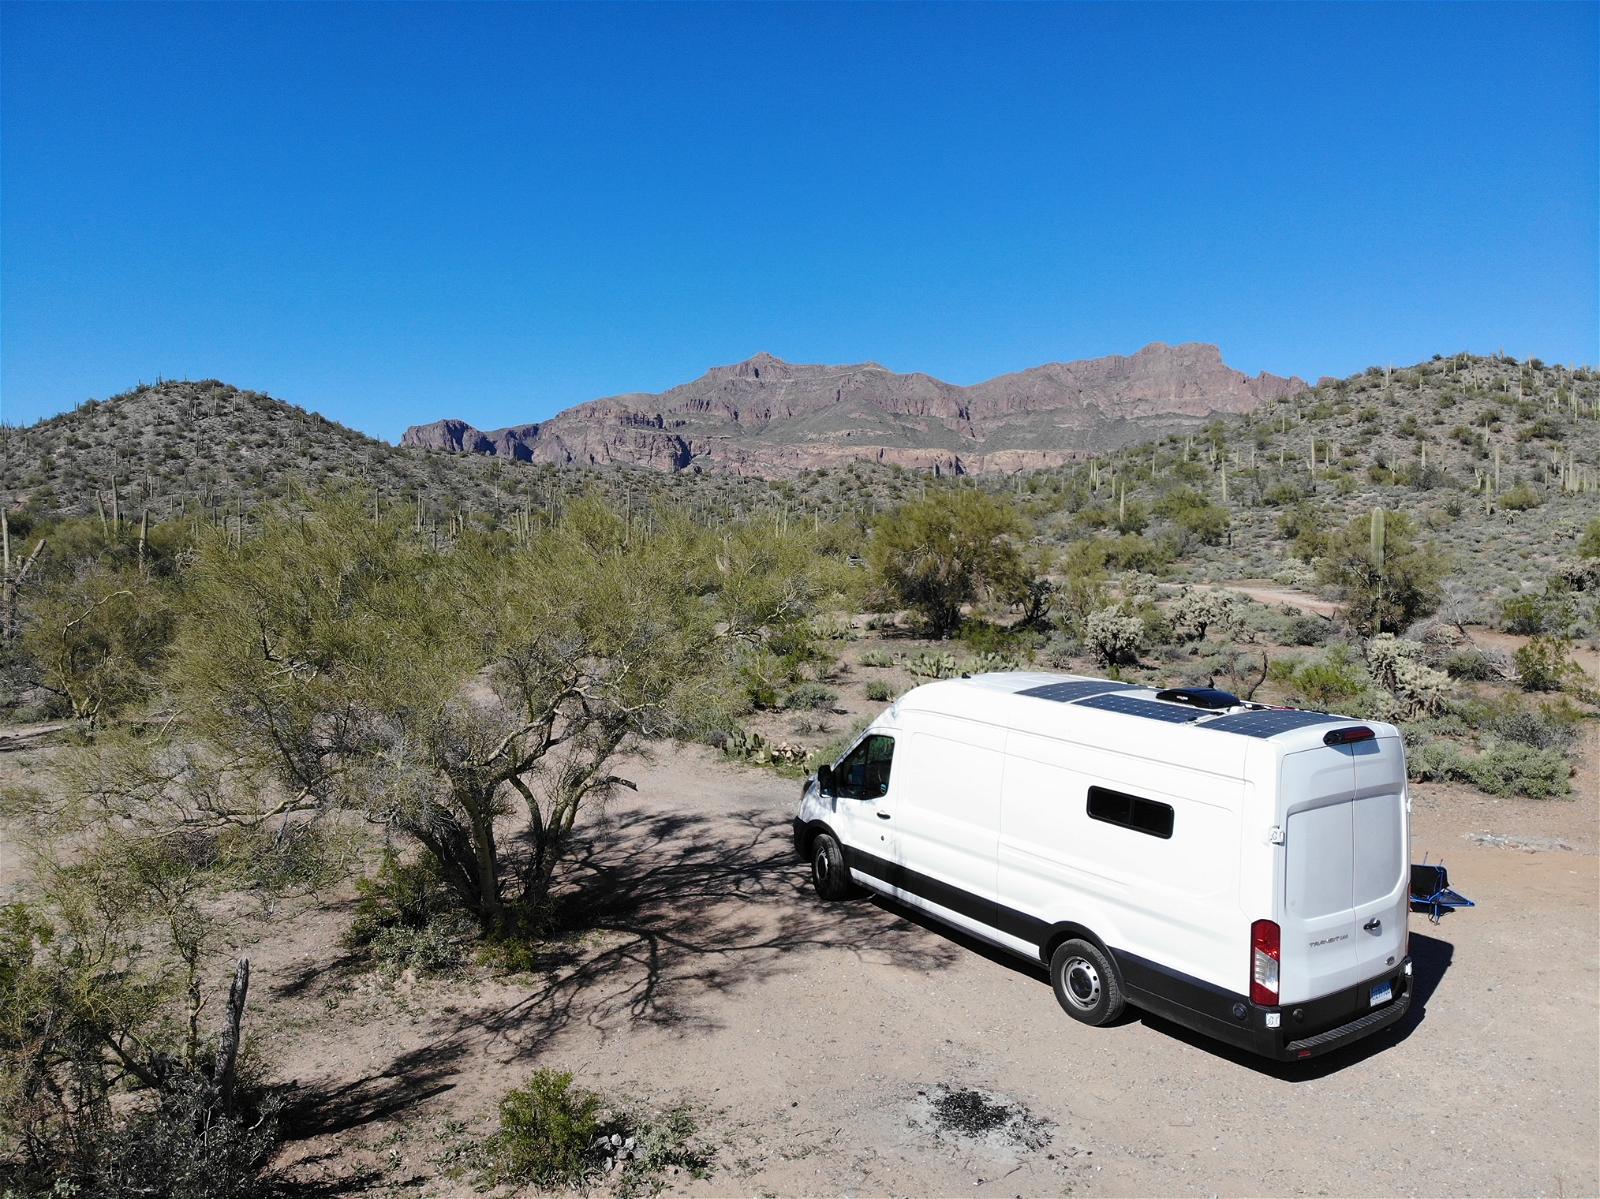
We’re Kels and Jay, a married couple who were fed up with mundane routine, craving adventure, and ready for change. So we bought a school bus and after 8 months, our bus was fully converted into a tiny home on wheels. After a year of travel we realized we were ready to downsize again, so we bought a van. And now we are based out of CT, building out adventure rigs for other people so they too can experience life on the open road with all the comforts of a conventional home.
THE BIG QUESTION: AGM vs LITHIUM?
So you’re looking at the batteries you will use in your system and you are wondering “should I keep it simple and get some AGM (Absorbent Glass Mat) or make the investment in Lithium ion phosphate batteries?”
Let’s look at the pros and cons of each…
AGM
Pros:
Cons:
LITHIUM
Pros:
Cons:
Now we have a general idea of what can power your system, let’s dive into the actual system as a whole…
Electrical in any travel rig can look very different for each application. You can go super basic and charge all your devices, plug in appliances etc with the use of a power station such as a Jackery. But as you can imagine this has its limitations.
Things you want to consider when designing your electrical set up…
Once you’re able to answer some of these questions, you’ll have a better idea of the direction you want to go.
The way we personally travel, we are very rarely plugged in to shore power to charge our batteries so this meant we would need a large battery bank and multiple ways of charging our batteries.
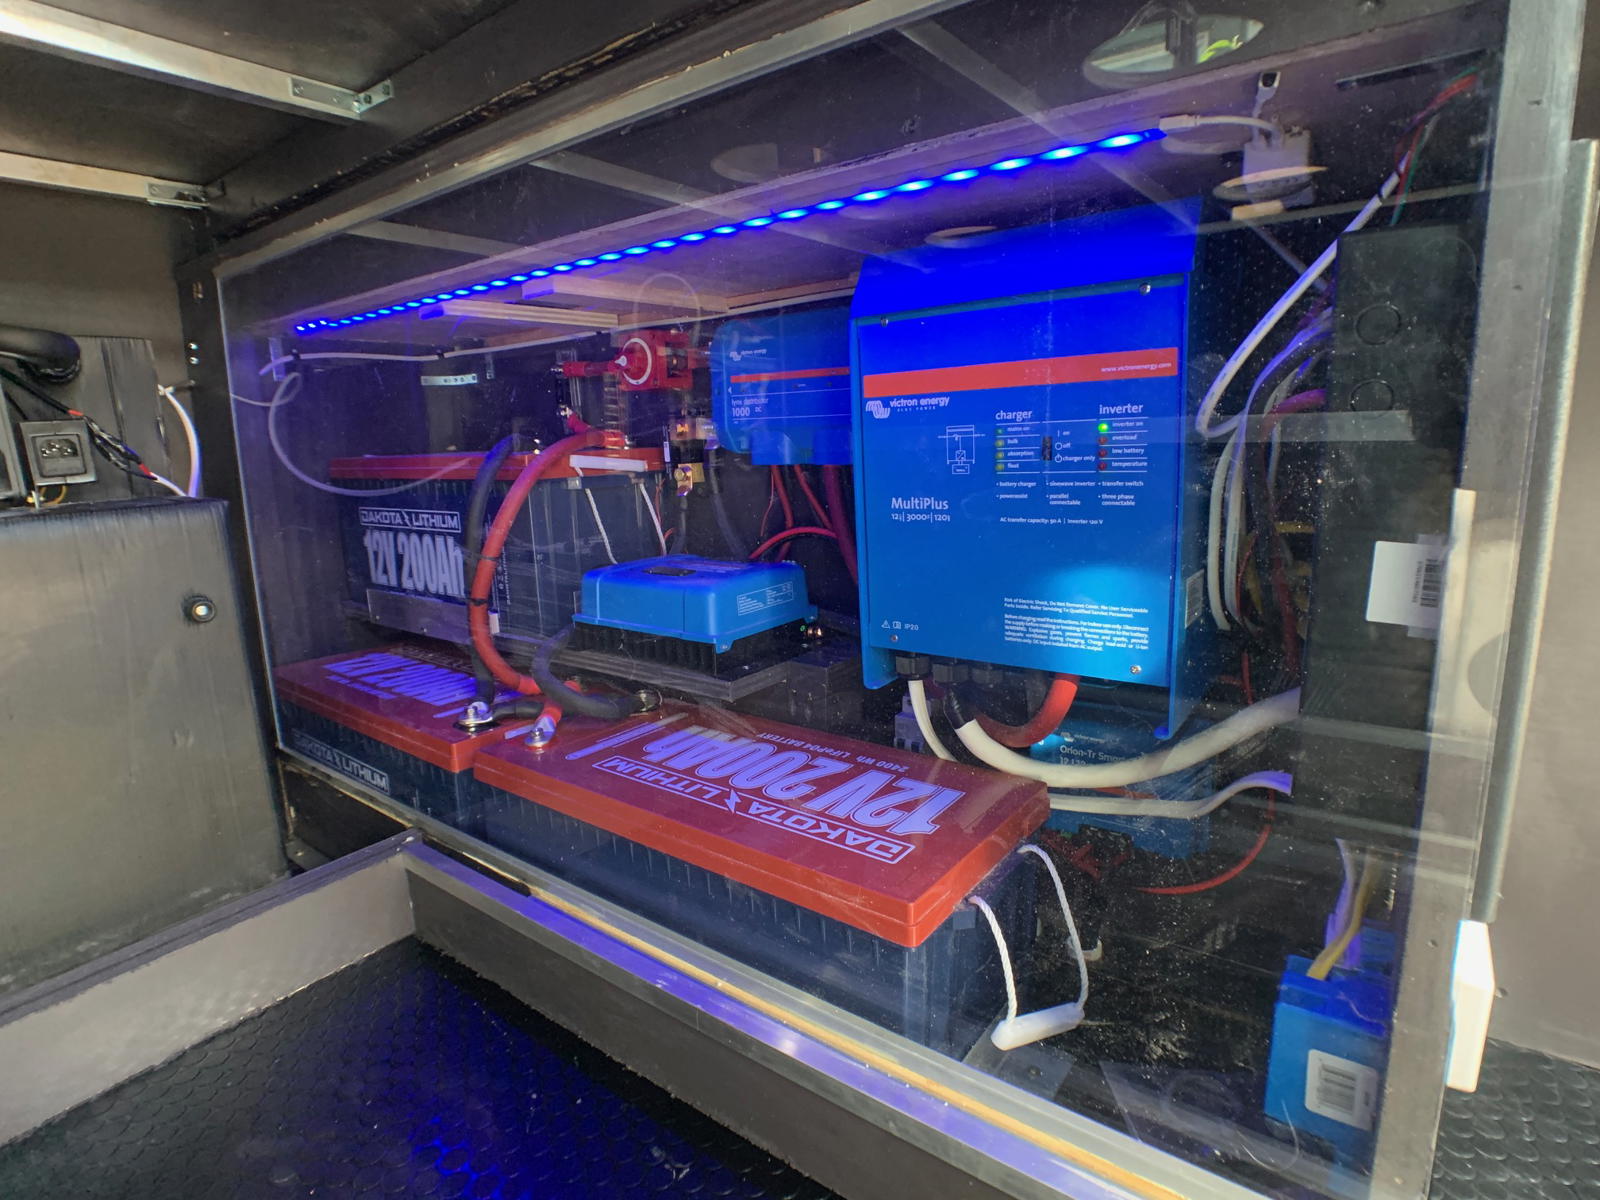
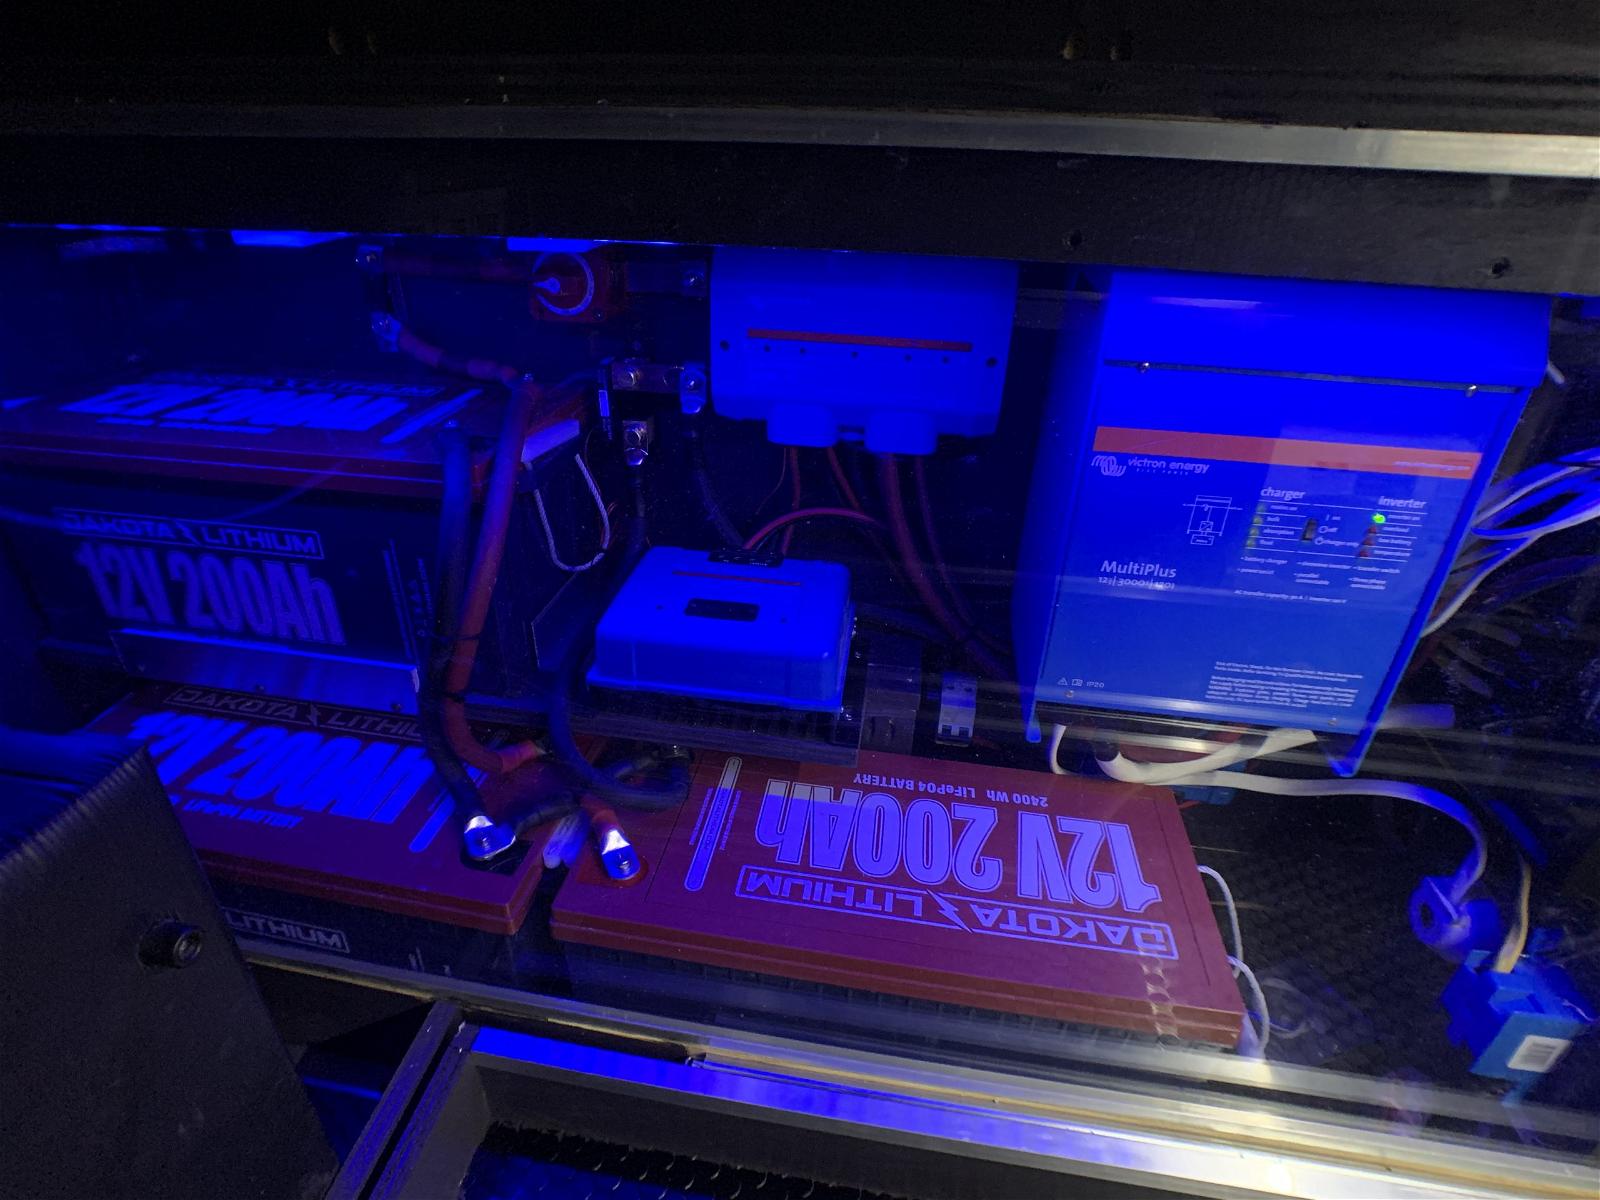
Our battery bank is 3 x 12v 200ah lithium batteries from Dakota Lithium. Totaling 600ah of power.
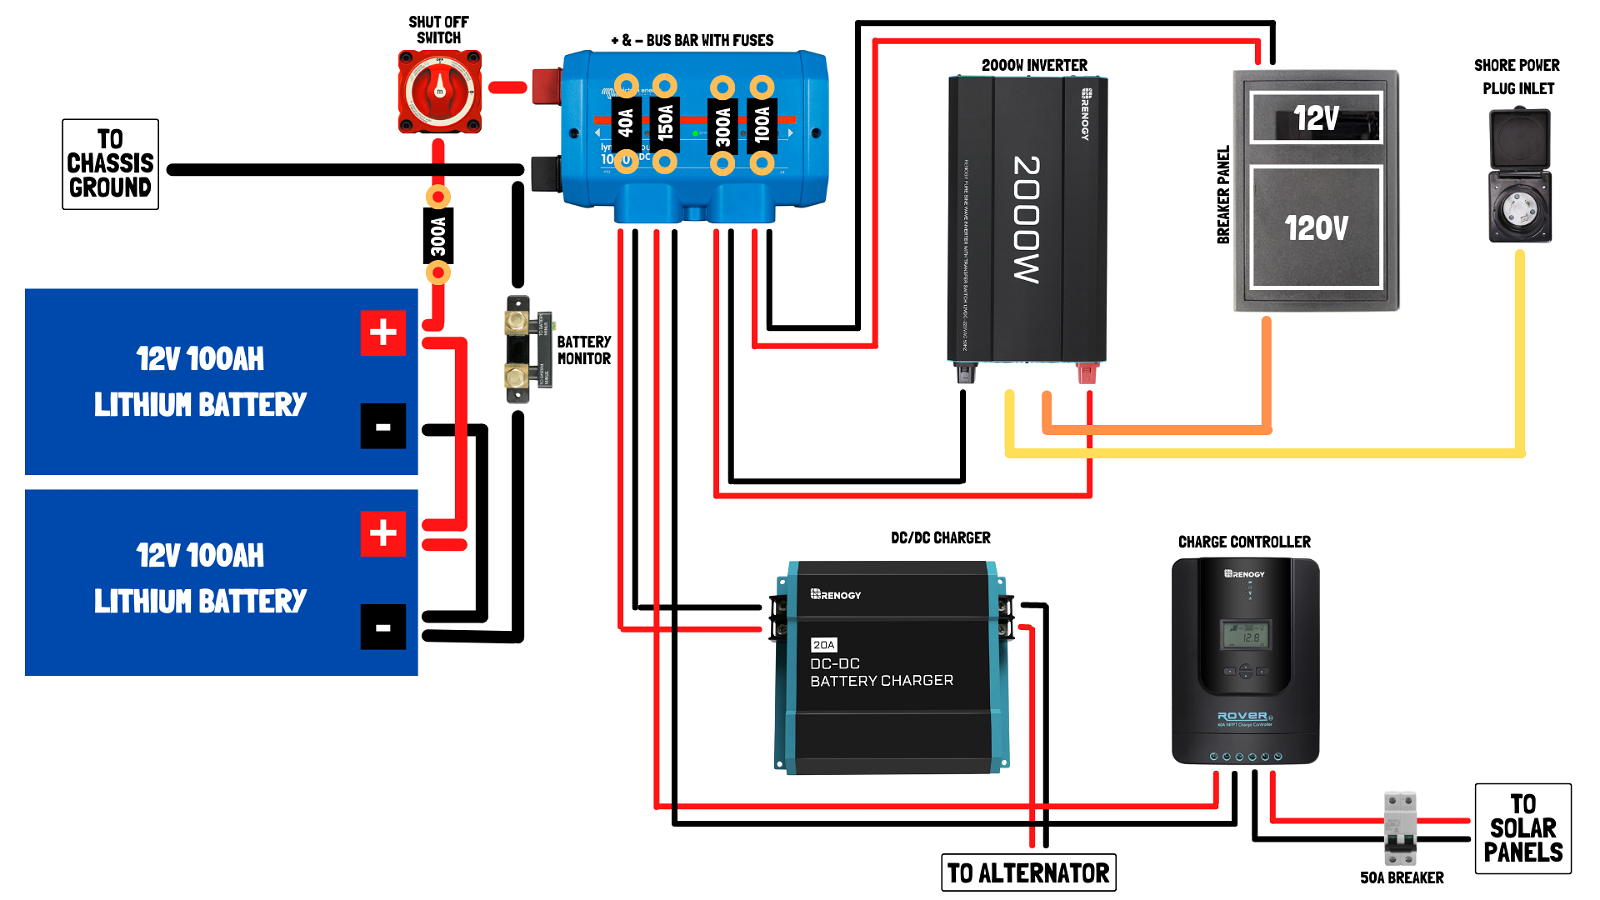
Let’s start by looking at how our system is laid out and then we can talk about each component and what role it plays in giving us power to live off grid.
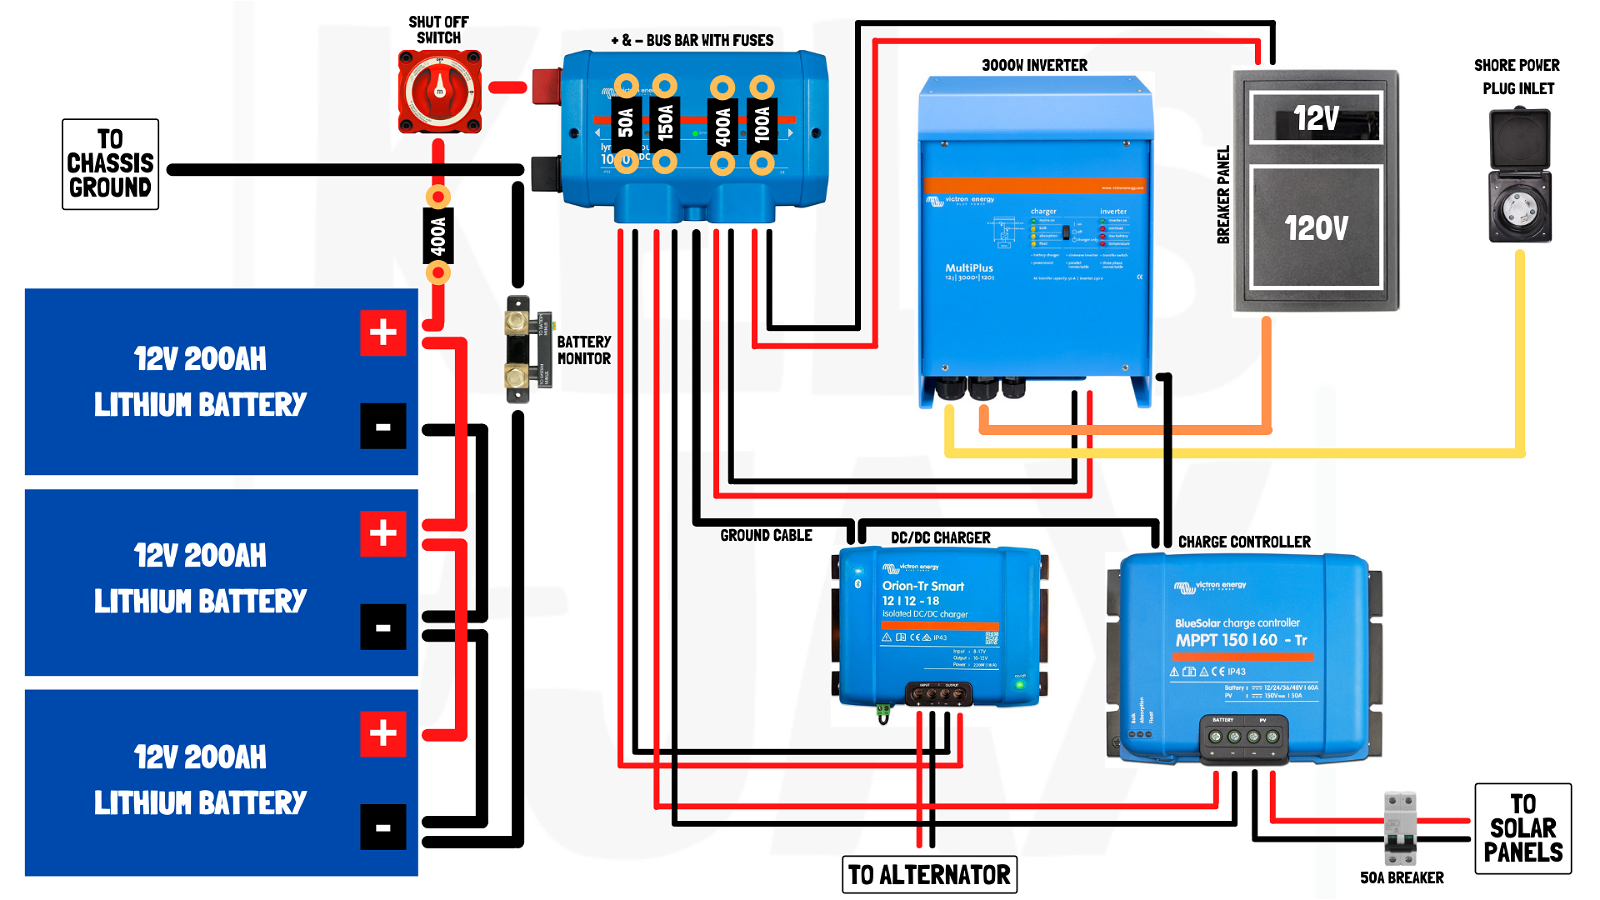
Ok, so I know at first glance it may seem like there is alot going on here with wires going in a bunch of directions but let’s break it down by each component real quick. It’s not as complex as it appears.
Batteries: These are lithium batteries which store all the power to run everything we need.
Shut off switch: Placed right after the batteries which can shut off the power from the batteries to the rest of the system
Battery monitor: Connects to an app on our phone to tell us the status of the entire system. How full the batteries are, time until dead, voltages etc
Bus bar with fuses: Here is the control center of the system where components connect to the batteries with a fuse in between. A bus bar is basically an extension of the battery terminals so you can connect a bunch of things to the batteries.
Inverter: Simply converts 12v coming from the batteries, to 120v which then feeds the 120v panel. Also, recharges the batteries when we plug in to shore power.
DC/DC charger: Charges the batteries from the vehicle batteries when the engine is on.
Charge controller: Controls the power coming in from the solar panels.
Breaker panel: Where all appliances are fused. Similar to what you find in a residential house.
Shore power inlet: Here we plug in to the grid to recharge our batteries.
Ok, great. Now we have wrapped our heads around what components are involved and how they work together, it’s time to figure out how to ‘size’ the system.
There are two main components that this is referring to. The battery bank itself and the inverter.
BATTERY BANK SIZE
To size your battery bank, first you need to establish the load you will be requiring from them. Here are some great questions to ask yourself to get a clear idea of your needs.
For us, living full time on the road we have found the sweet spot to be 400-600ah of lithium to power all our needs. Laptops, fridge/freezer, maxxair fan, lights, tv monitor etc.
INVERTER SIZE
For the inverter we refer to size in terms of watts. The most common options are 1200w, 2000w, 3000w, 5000w. With every increase in power capacity, the inverter itself increases in size and price.
This number is how many watts the inverter can produce at any one time.
To put it in to perspective here are a few example of what some common components require to function:
So you will want to make sure your inverter can handle the different components you will be running at any one time.
For example if the fridge compressor is running while you are using the blender and the hot water heater is on too. That’s a total of 2850 watts. Therefore you would need at least a 3000w inverter. Of course you could ensure you don’t run your higher appliances at the same time and then you could opt for a smaller capacity inverter instead.
LOOKS EVEN BETTER WHEN IT IS DARK!
HOW TO KEEP YOUR SYSTEM CHARGED UP
It’s all good and well having a large battery bank but what do you do to keep the batteries charged up? There are 4 main ways to recharge the house batteries
SHORE POWER
Plugging in to the grid at a campsite or someone’s house
SOLAR POWER
Solar panels you can put on your roof. You can even get collapsable, portable panels
ALTERNATOR
Can connect to your van batteries or the engines alternator directly
GENERATOR
Those noisy things that run on gasoline
For us we have solar power, charging from the alternator and the option to plug in to shore power.
SHORE POWER
Every rig should have the option of shore power. It’s as simple as adding a 30 or 50 amp plug to the exterior of your vehicle and connecting it to your inverter/charger. This means you can plug in to a campsite or any house.
This is what our shore power plug looks like. It is 30amps. You really only have to go the 50amp route if you have an ac unit or something else that pulls a lot of power and requires two phase AC (alternating current).
You see these mounted on the outside of the vehicle for easy access.
SOLAR POWER
Probably the most common off grid power source is getting energy from the sun. With this being such a popular option it has brought the cost of install down to an affordable price.
The general idea behind running your system off of solar is having panels on the roof that harness the energy from the sun, send it to your charge controller and this then regulates the voltage and charges your batteries.
As I’m sure you can imagine this comes with some challenges. The main one being that if there is no sun, then you aren’t charging your batteries. This is why it is important to have multiple ways to recharge your batteries. For example, maybe on the days when you aren’t getting a lot of sun i.e it’s cloudy, you could drive for a few hours and recharge your batteries from your alternator instead.
Also worth noting is that in the winter months when the sun is naturally lower in the sky, solar panels are 40-60% less efficient compared to summer months.
Another issue with having solar is that sometimes it can force you to have to park in the sun on those blistering hot days.
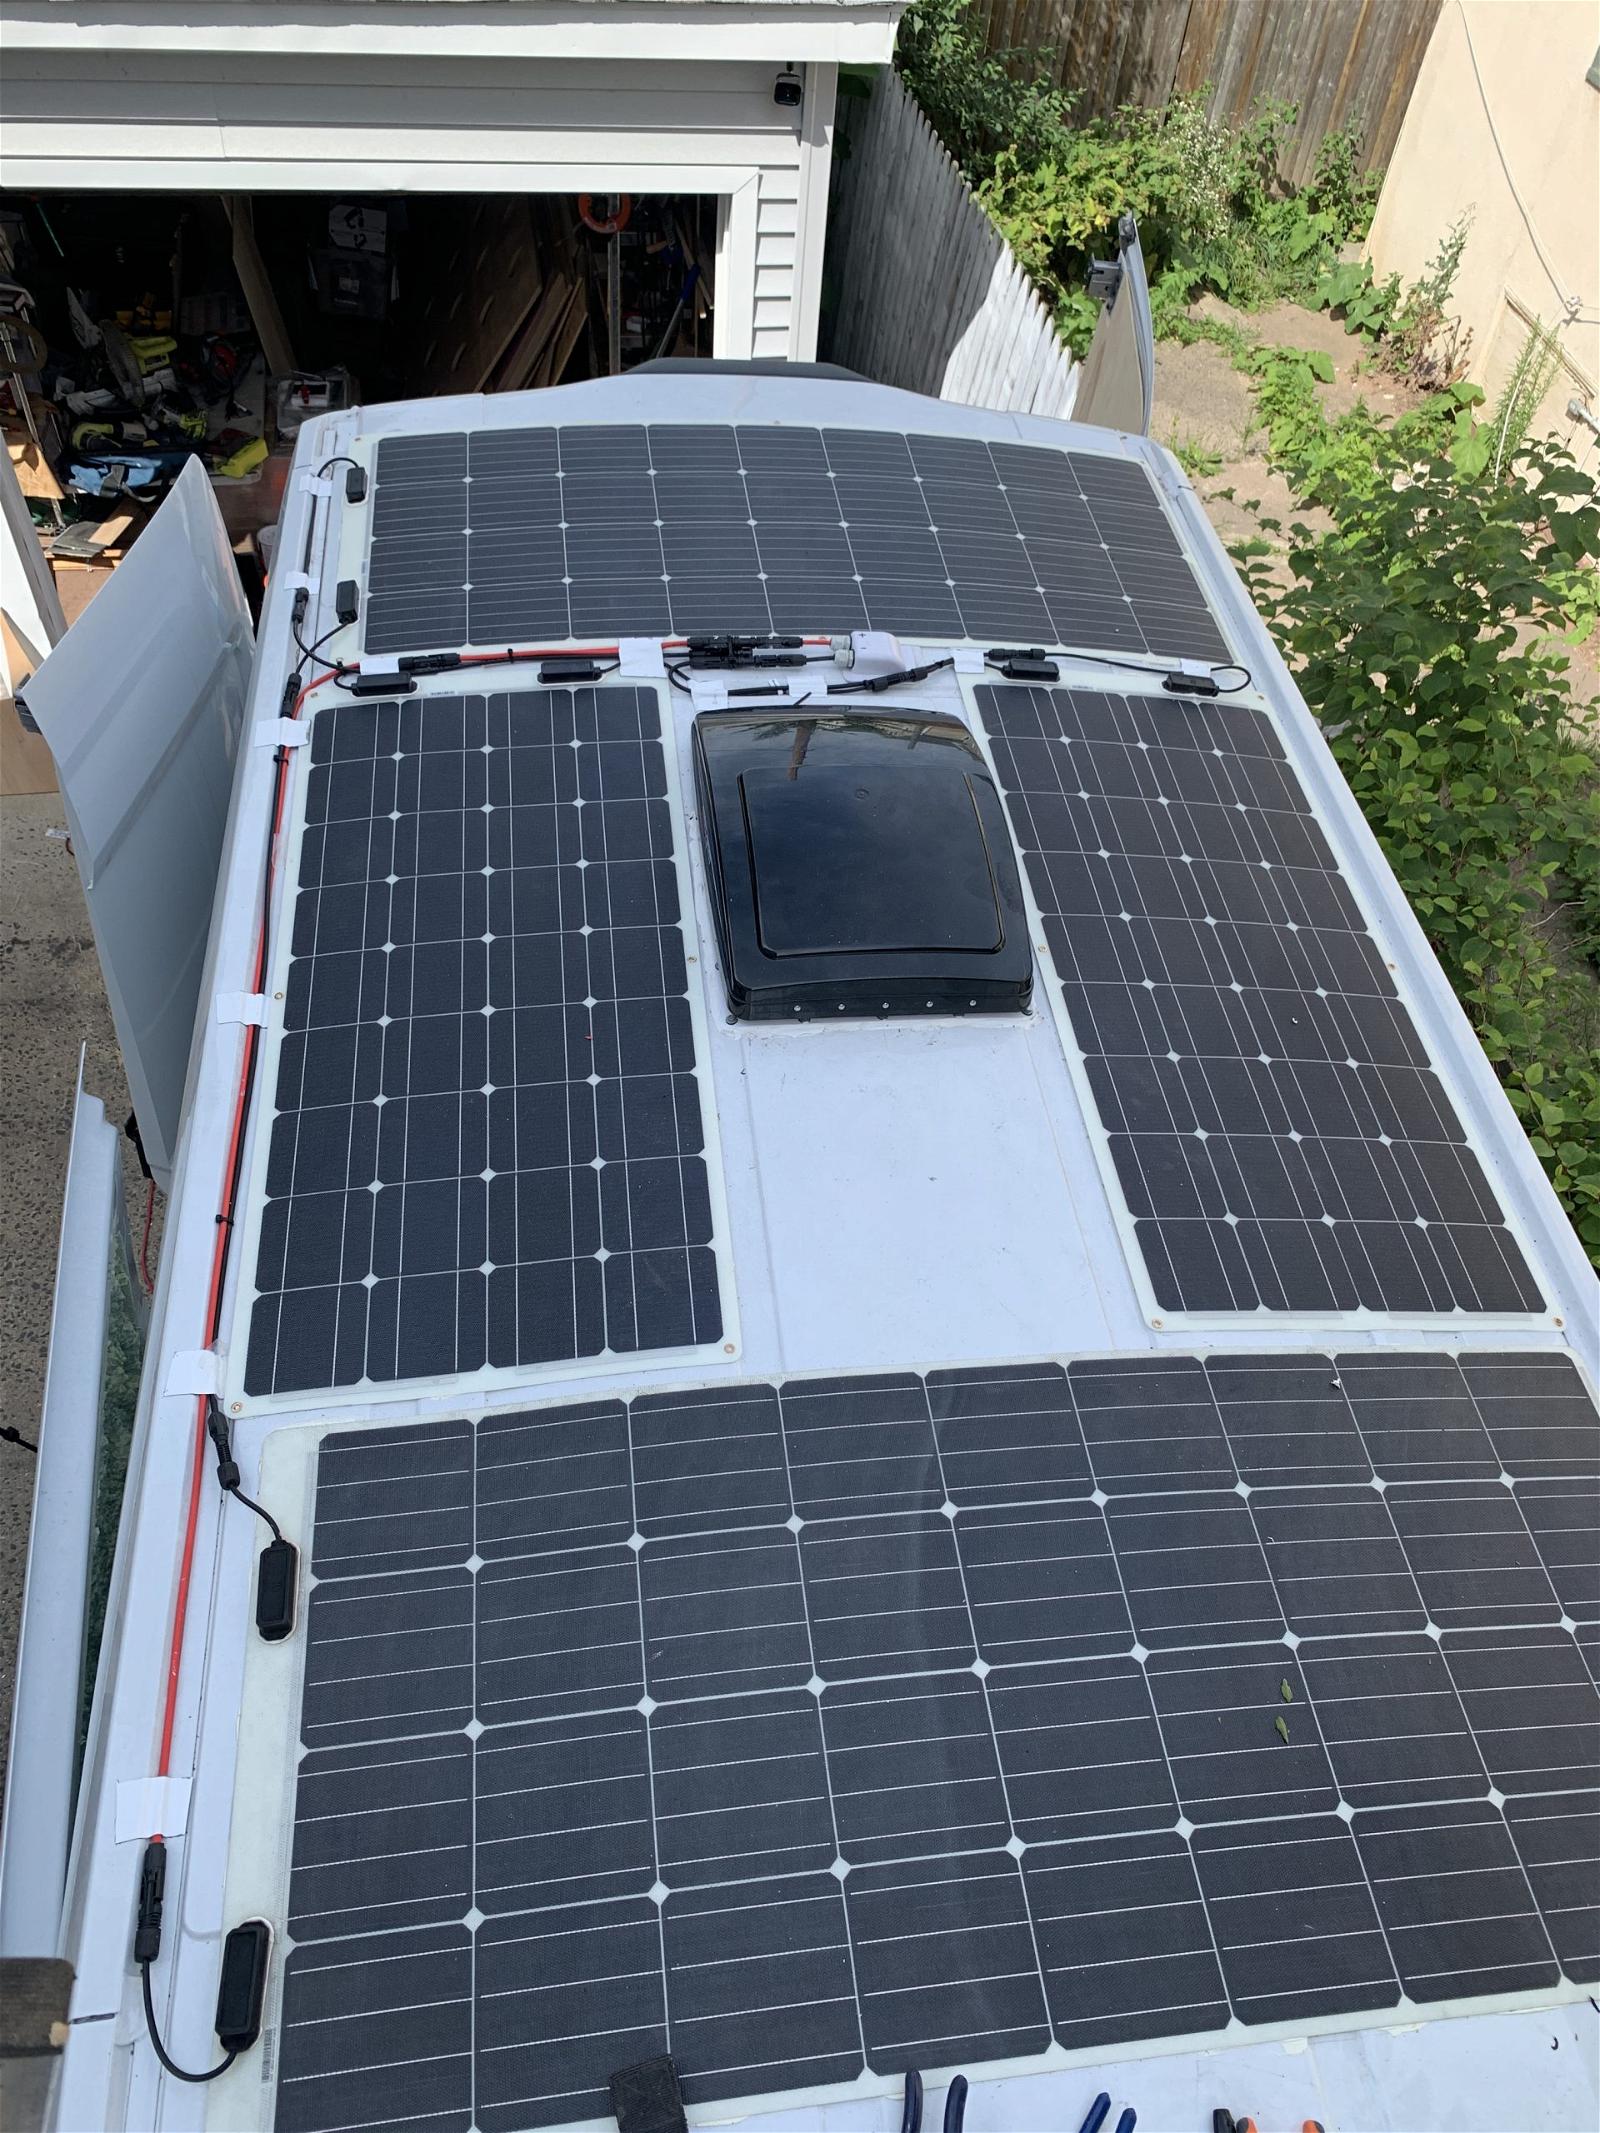
In terms of panels there are two main options. This is rigid or flexible panels
Rigid panels are the most commonly used panel for a couple reasons. They are structurally sound and allow airflow underneath the panel when mounted. This is great to keep the panels cool. Also, with it being rigid it can be installed with adjustable foot mounts so you can tilt the panels towards the sun at different times of the day or depending on how you are parked.
The only real drawback with rigid panels is that to secure them to the roof you have to drill into the roof to bolt the foot mounts to your rig.
Flexible panels are a lot lighter than rigid panels and you can simply glue them to your roof using sikaflex, meaning no holes in the roof, so no potential leaks. The downside to this is that there is no airflow under the panel which can cause them to get very hot, which in turn lowers the panel’s efficiency.
With that being said we went with the flexible panels. We chose these for a couple of reasons.
HOW MANY SOLAR PANELS SHOULD YOU GET?
Think of it this way… Your batteries power everything in your rig and the solar panels charge those batteries.
Solar panels are measured in watts and come in a variety of shapes and sizes. 50, 75, 100, 175, 200, 320 are some of the most common.
A great rule of thumb is you need 200 watts of solar per 100ah of usable battery capacity.
For example if you have a 400ah Lithium battery bank, then 800 watts of solar is sufficient to keep those batteries topped up when averaging 6 hours of sunlight in a day.
The math behind this is as follows:
Once you have established how big of a solar array is appropriate, you can figure out what size panels will work and fit in the area you have available on the roof.
A great thing I have learnt over the years is to account for shade from any maxxfans or ac units on the roof when considering panel placement.
A SYSTEM PERFECT FOR THE “WEEKENDER”
Everything mentioned up until this point is more geared toward the “fulltimer”. But what about a set up for weekend trips and short getaways?!!
While the system itself is still relatively similar, in order to stay on budget you can swap out components for cheaper alternatives. Granted you get what you pay for but if you are only in your rig for a long weekend, then they are more than capable of getting the job done.
The most common budget friendly alternatives to the market leading Victron Energy is Renogy.
While still safe in their construction and ease of install, they are a solid alternative.
Also for the weekender, you won’t need a 3000w inverter and can settle for a smaller more affordable 2000w version. This is also similar to the size of your battery bank and therefore solar array.
I would recommend a 200ah battery bank to see you through a short getaway. Accompany that with 200-400 watts of solar and a 20amp dc/dc charger and you will be powered for the whole trip without any worries.
Here’s what this system could look like:
One thing I have definitely learned is that your electrical system is not an area you want to try to save a few pennies. You get what you pay for! There are many brands out there that can fulfill your needs for power on the road but in terms of reliability and safety, Victron Energy is by far head and shoulders above the rest. Their built in bluetooth features and the fact that you can control and monitor every component in your system on the Victron connect app on your phone is what sets them apart from their competitors for me.